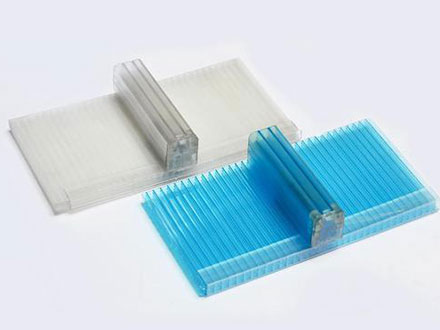
Shanghai Jienai lock catch sunlight plate is an engineering plastic with effective comprehensive performance, which has outstanding physical and mechanical properties and is fully used in the interior and exterior decoration of commercial buildings; Railway station, airport, waiting hall and passage ceiling; Gardens, agriculture and indoor fish greenhouses are known as "transparent plastics".
In addition to the advantages of ordinary sunlight plate, the locking sunlight plate also solves the tedious installation process of the plane sunlight plate. It will no longer use stainless steel or aluminum profile strips and glue bonding and other links, bringing light work flow to the construction personnel. The U-shaped latch sunlight plate adopts the "butt buckle" and "buckle" design, which greatly shortens the installation cycle, just like the "fool" installation method, and has good sealing performance at the joints, without water leakage.

Installation steps of Shanghai Jienai lock catch sunlight plate:
1.The plates shall be cut to a specific length, and the two ends shall be suspended no more than 100mm. We suggest that there should be less 50mm plates inserted into the drainage channel, and it is recommended to use a circular saw or portable saw to cut the plates.
2.Cut the sealing strip, and use a small disc knife (2mm thick) to make 18mm deep horizontal cuts on both sides of the plate corners. The cut shall be parallel to the top surface of the plate, but shall not damage the surface of the plate. This step requires precision, so it is recommended to cut the cut before assembly, remove the cutting debris, and blow away the debris or particles left in the plate.
3.Plan the layout of the board, place the board near the front, and only remove the PE protective film inside the board. Make sure that this surface does not touch the sandalwood strip on the fog surface before the plate is positioned at the end to prevent scratches.
4.Fix the T-shaped fastener along the plate. At the remaining part of the main sandalwood (see the secondary sandalwood design span table), point the T-shaped fastener against the plate and fix it with hexagon head screws. For the bending design on the arch member, the T-shaped fastener should be located in the middle of the arch top as the intermediate fastener.
5.Lock the two plates, remove the PE protective film under the second plate, and place it next to the T-shaped fastener. Use a plastic hammer to fix the connector along the connector, knock it at a short interval (5-10cm), lock the two fast plates together, start from the low end, and gradually walk over the roof (ensure that the connector is suspended 3mm higher than the tail end of the plate, because aluminum sealing strips will be installed later
6.Remove the outer covering film, first remove the OMM on the edge of the plate, and then remove all the film immediately after the installation to prevent the film from adhering to the plate after a long time.
7.The U-profile is designed to be installed to close the bite with the plate, and one end should be sleeved at the beginning, and then tapped slowly until the PC is inserted. The U-profile can be tapped by hand, while the aluminum U-profile does not need a plastic hammer.
8.Fix the connector plug. Insert the connector plug at both ends of the connector. The PC connector plug is pushed in. The end cap of the aluminum connector is fixed with screws, without silicone sealant or any other adhesive.
9.Fixed side rain shield The side rain shield is provided on both sides of the structure, which is both a fastener and a rain shield. They can match the full width and cut size of the plate. In some cases, it is necessary to customize the rain shield. Both ends of the rain shield shall be plugged.


