


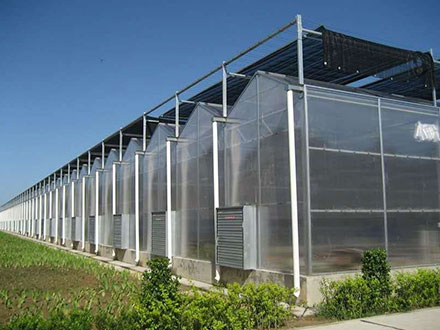
The main material of the greenhouse is PC sunlight board. Shanghai Jienai sunlight board is made of polycarbonate PC raw materials from German "Bayer" company and is produced through the UV PC coextrusion production line. The board surface is evenly distributed with a high concentration of UV anti UV coextrusion layer, which can prevent the damage of ultraviolet rays to the board and extend the service life of the board. Now let's introduce the installation steps of the sunlight board in the greenhouse
(1) Construction sequence
Surveying and setting out → installing the main framework of the solar panel ceiling → adjusting, leveling and fixing the main framework of the solar panel ceiling → installing and leveling the secondary framework of the solar panel ceiling → installing the outer layer of the solar panel → gluing and installing the layering → installing the inner layer of the solar panel → gluing and installing the layering → detailed adjustment and treatment of the outer cornice of the solar panel ceiling.
(2) Main construction process of sunlight plate
1. Snap the line: snap the position line of the main skeleton of the sunlight plate ceiling according to the elevation of the drawing, the location dimension of the sunlight plate ceiling and the measured centerline.
2. Embedded parts: according to the position of the main skeleton of the sunlight plate ceiling in the elevation control line, check whether the upper surface elevation of the portal reverse beam meets the design requirements. If there is a difference, chisel or level it with high-strength cement mortar. After reaching the strength, set out the position line of the expansion bolt according to the size of the embedded steel plate in the detailed node drawing of the deepening design, then drill holes to place the expansion bolt, install the steel plate and fix the expansion bolt. Then throw the center line of the main skeleton onto the embedded steel plate.
3. Install the main skeleton: according to the position line of the main skeleton of the pop-up sunlight plate ceiling, install the two ends first and then the middle part. The method is: × 60mm × After the main skeleton of 3mm square steel pipe (galvanized) is assembled on the roof, it shall be placed on the position line manually, and the vertical surface shall be hoisted with a line drop. After the middle is temporarily fixed, it shall be welded with the embedded steel plate. After the main skeleton at both ends is installed, pull three longitudinal wires with a height of 1500mm in the middle and at both sides (measured upward from the supports at both ends of the steel plate), and then install them one by one from one end to the other until they are complete.
4. Gluing and installation of layering: After fully checking the installation quality of the inner layer of sunlight plate, install the inner layer of sunlight plate, apply weather proofing glue and install special aluminum alloy layering. The screw spacing and position of the strip shall meet the requirements of the drawing.
5. Installation of outer sunlight plate: according to the layout position of the detailed design, install the 20mm thick sunlight plate of the outer layer with proper size. After installation, the edge, longitudinal joint and transverse joint of the sunlight plate are in one line.
6. Installation of inner layer sunlight plate: according to the drawing position, the inner layer 16mm sunlight plate with proper size shall be installed. During installation, the bottom of the upper layer shall be cleaned with a white towel. At the same time, the inner layer sunlight plate shall be cleaned before installation, so as to prevent the interlayer from being polluted and unable to be cleaned, affecting the macro effect.
7. Glue application and layering installation: after fully checking the installation quality of the outer sunlight plate, install the outer sunlight plate while applying weather proofing glue, and then install the special aluminum alloy layering. The screw spacing and position of the mounting strip shall meet the requirements of the drawing.


